 SentnelOps
Connect your AI tools
The full walkthrough, in plain English. Seven steps, almost all of them clicks in the dashboard — the only copy-paste is pointing your AI tool at SentnelOps at the end.
Step 1 — Create your account
Go to platform.sentnelops.com/register and fill in the form: your organisation's name, your name, your email, and a password. Click Create tenant — that's the whole signup.
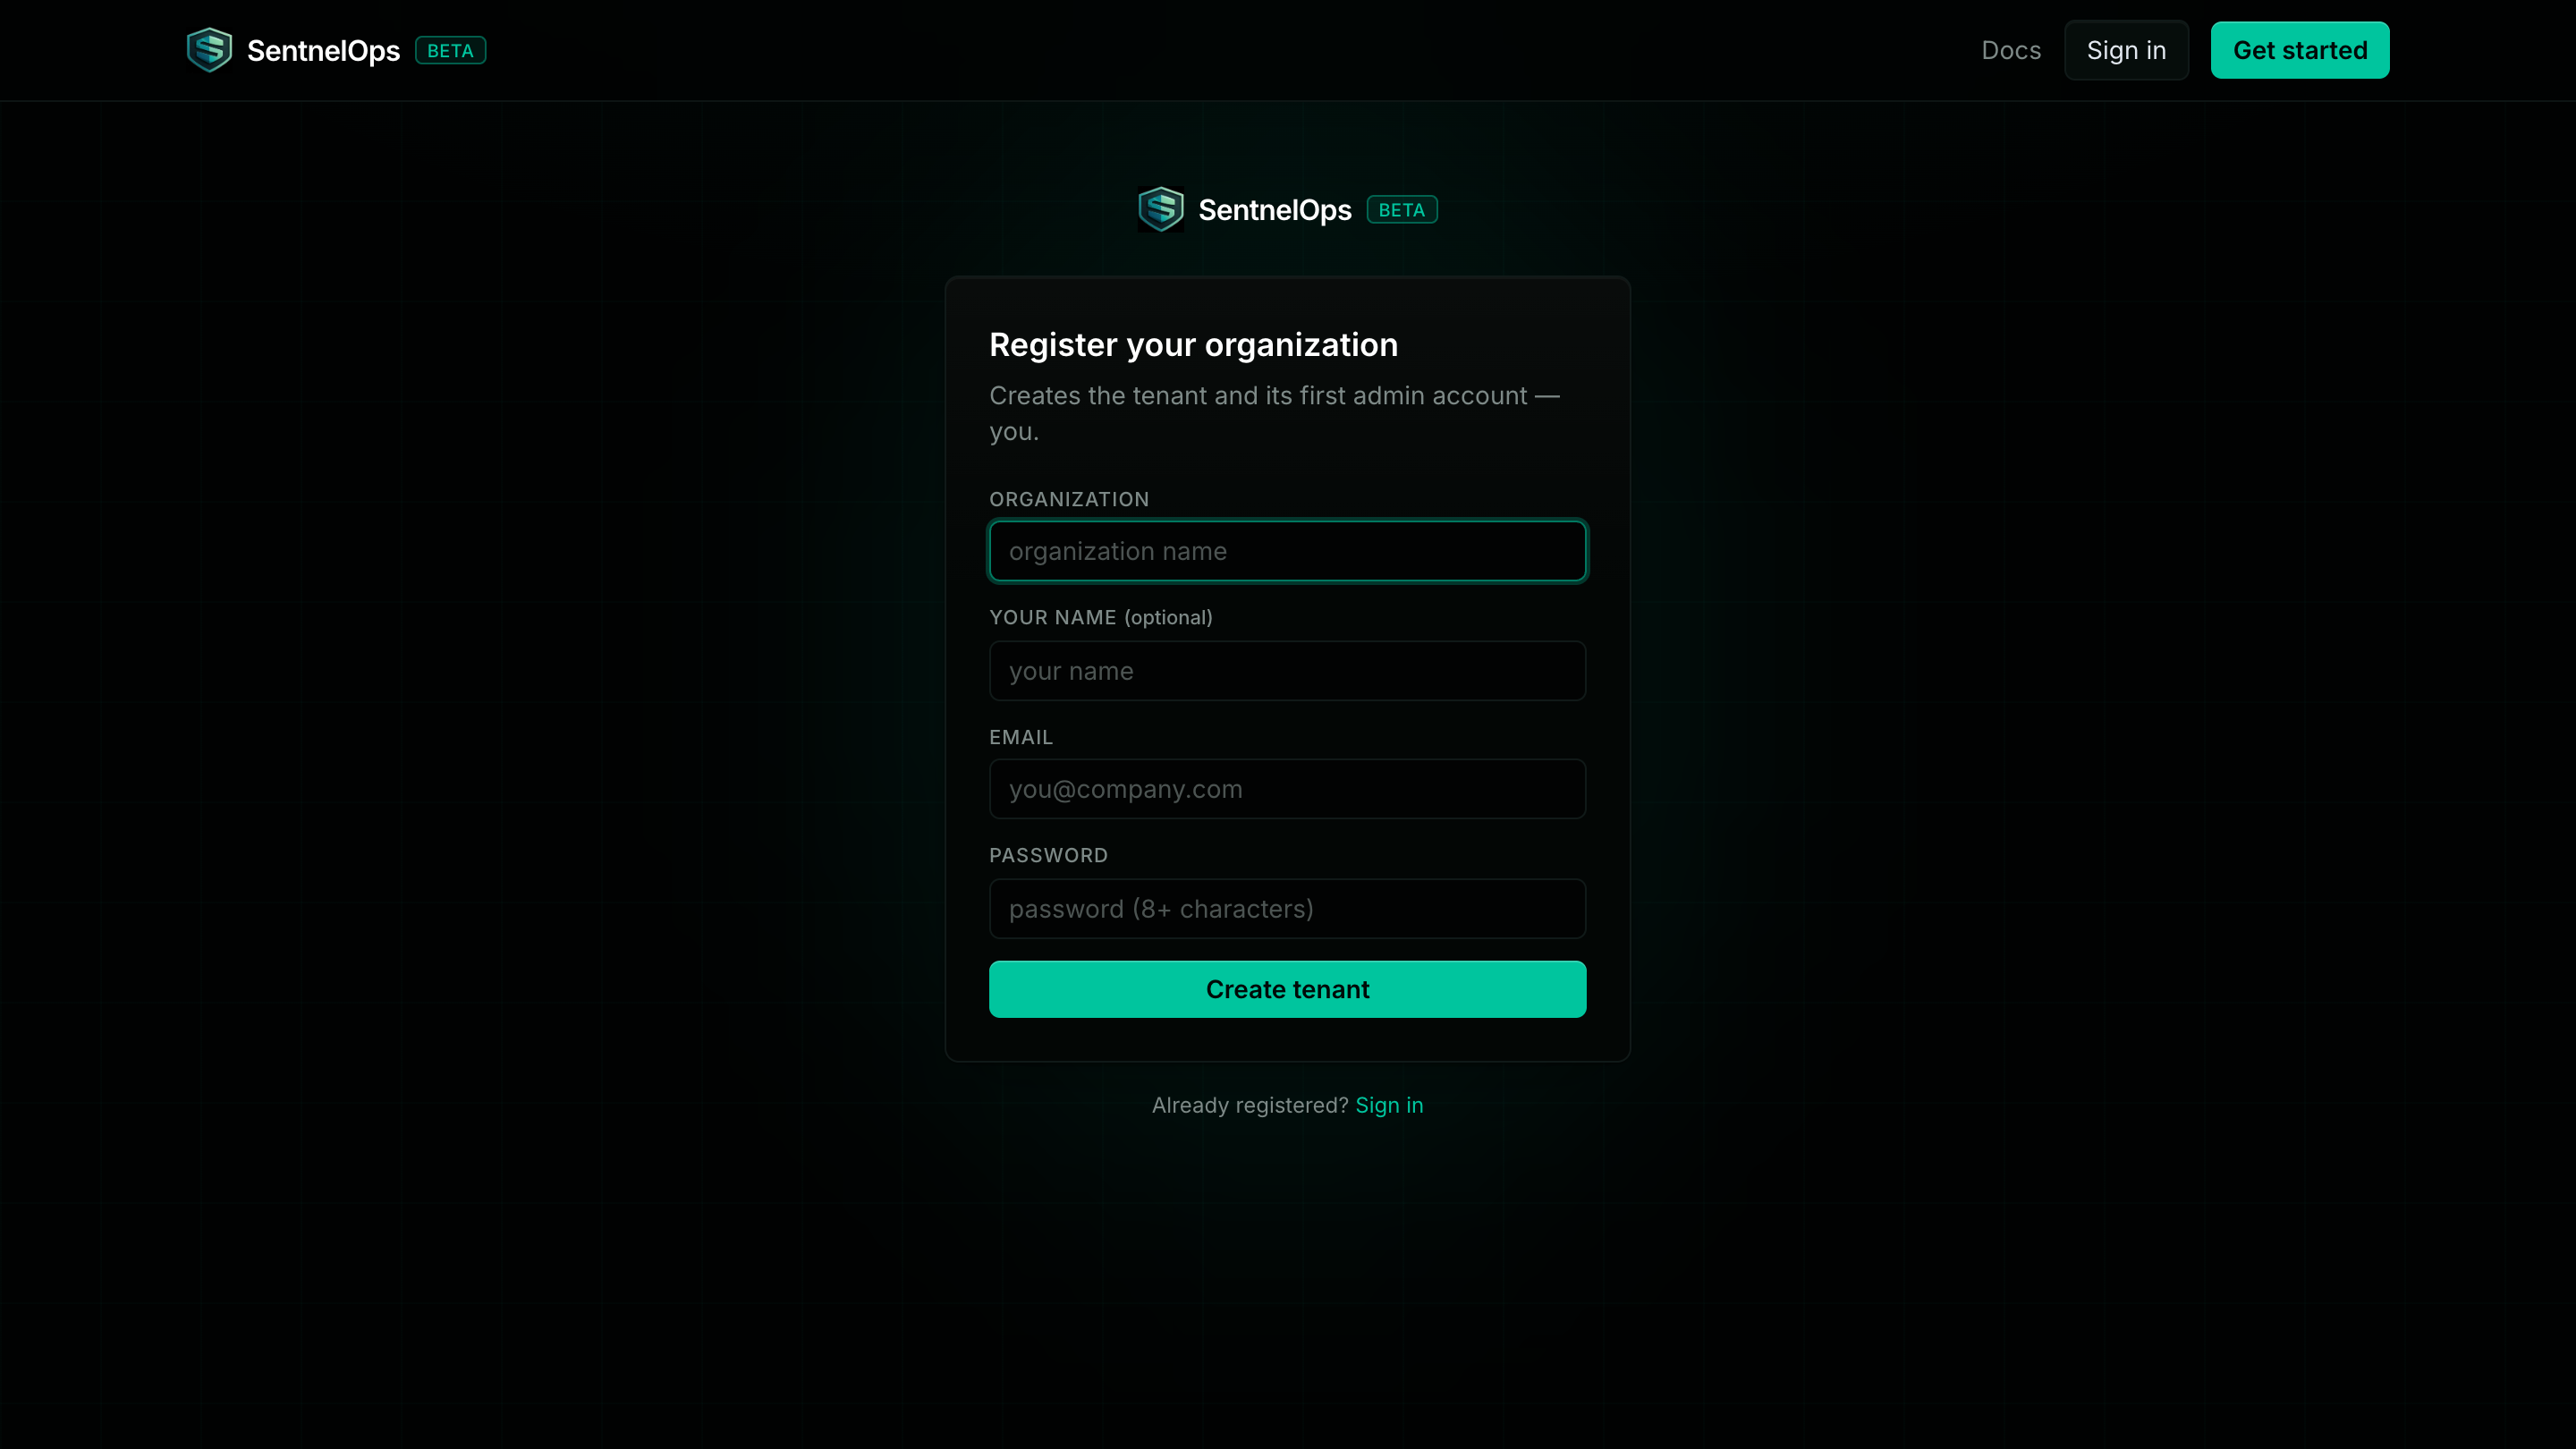
snops_key_). It is shown exactly once — click Copy and store it in a password manager. You won't need it for this walkthrough, but the SDKs and CI use it later.What just happened? Your company now has its own private space in SentnelOps, and you are its first admin. Nothing you register or log is visible to anyone outside your organisation.
Step 2 — Add your MCP server
An MCP server is the tool service your AI talks to — the thing that actually reads files, queries databases, or sends messages. SentnelOps needs its address so it can stand in front of it.
In the dashboard, open Servers in the top navigation. Fill in the form at the top of the page — a short server name (like github) and the upstream URL where the server lives — then click + Add server. It appears in the table below immediately.
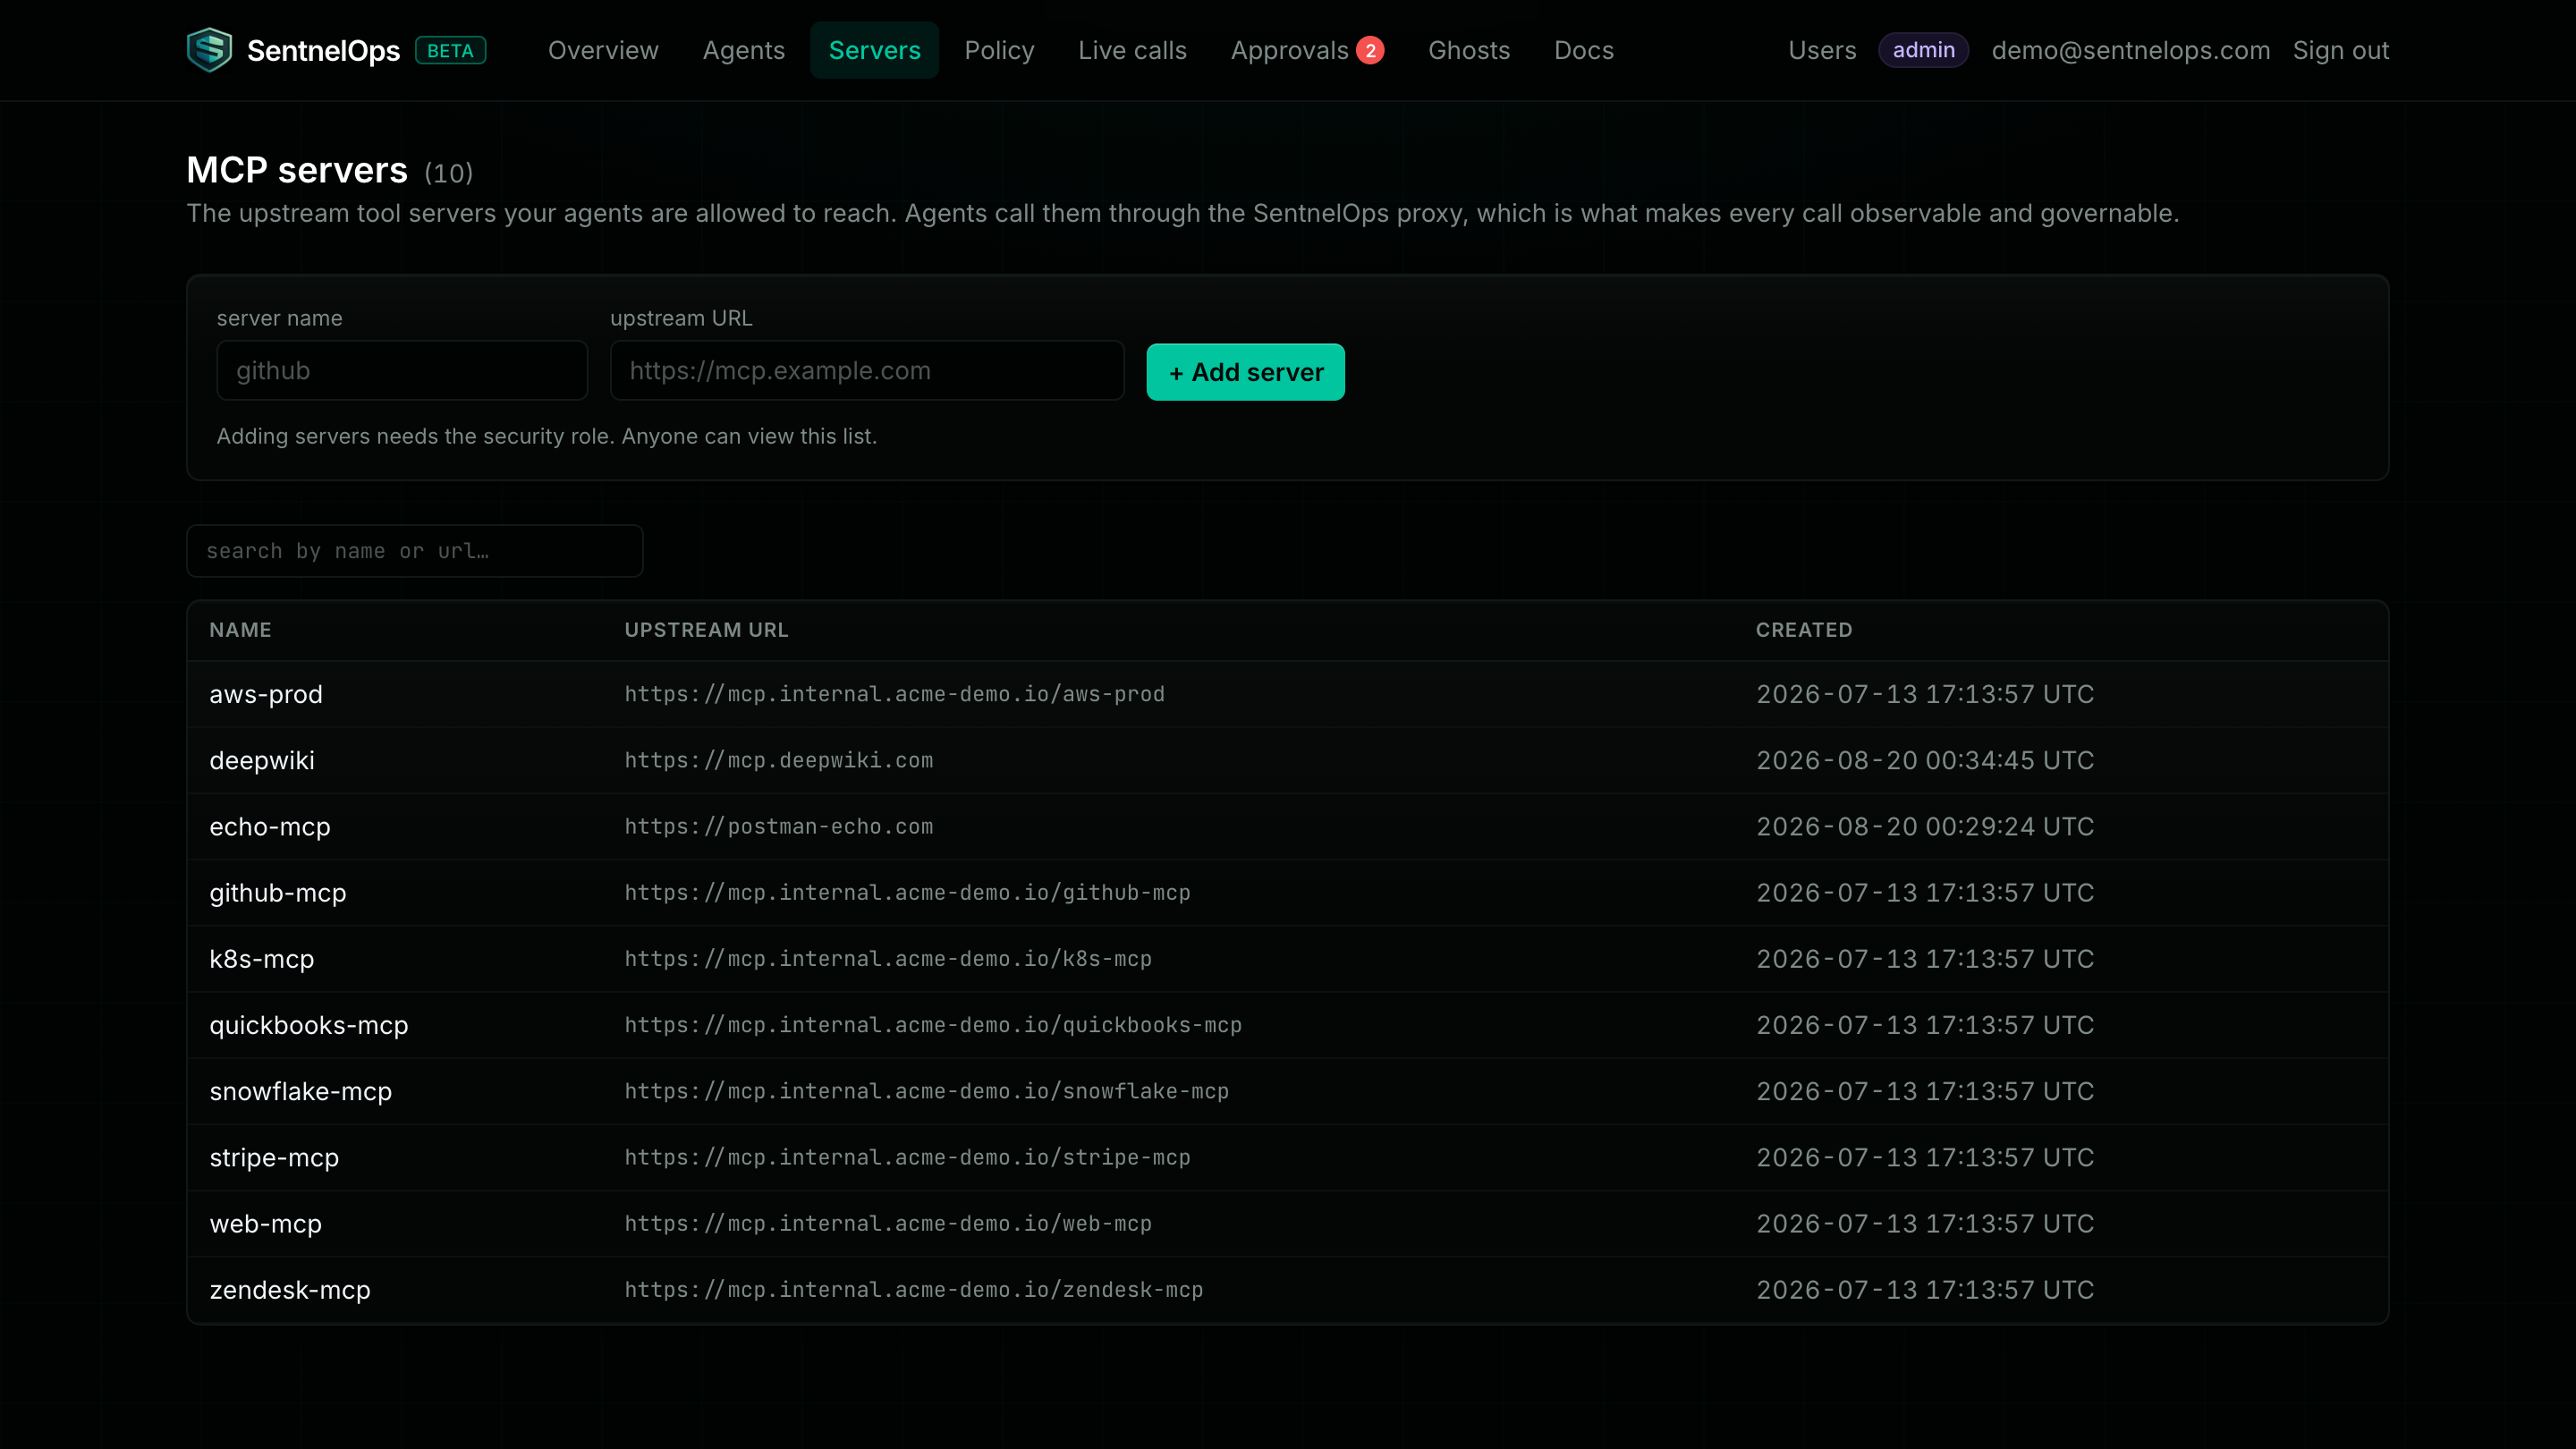
Don't know the upstream URL? It's the url currently sitting in your AI tool's MCP configuration.
security or admin role. You signed up as the admin, so you're covered — teammates with lower roles can view the list but will be asked to get the security team to add servers for them.What just happened? SentnelOps now knows where your tools live. From now on it can receive calls addressed to your server, write them in the logbook, and pass them along unchanged. Nothing is blocked — it only watches.
Step 3 — Register your agent
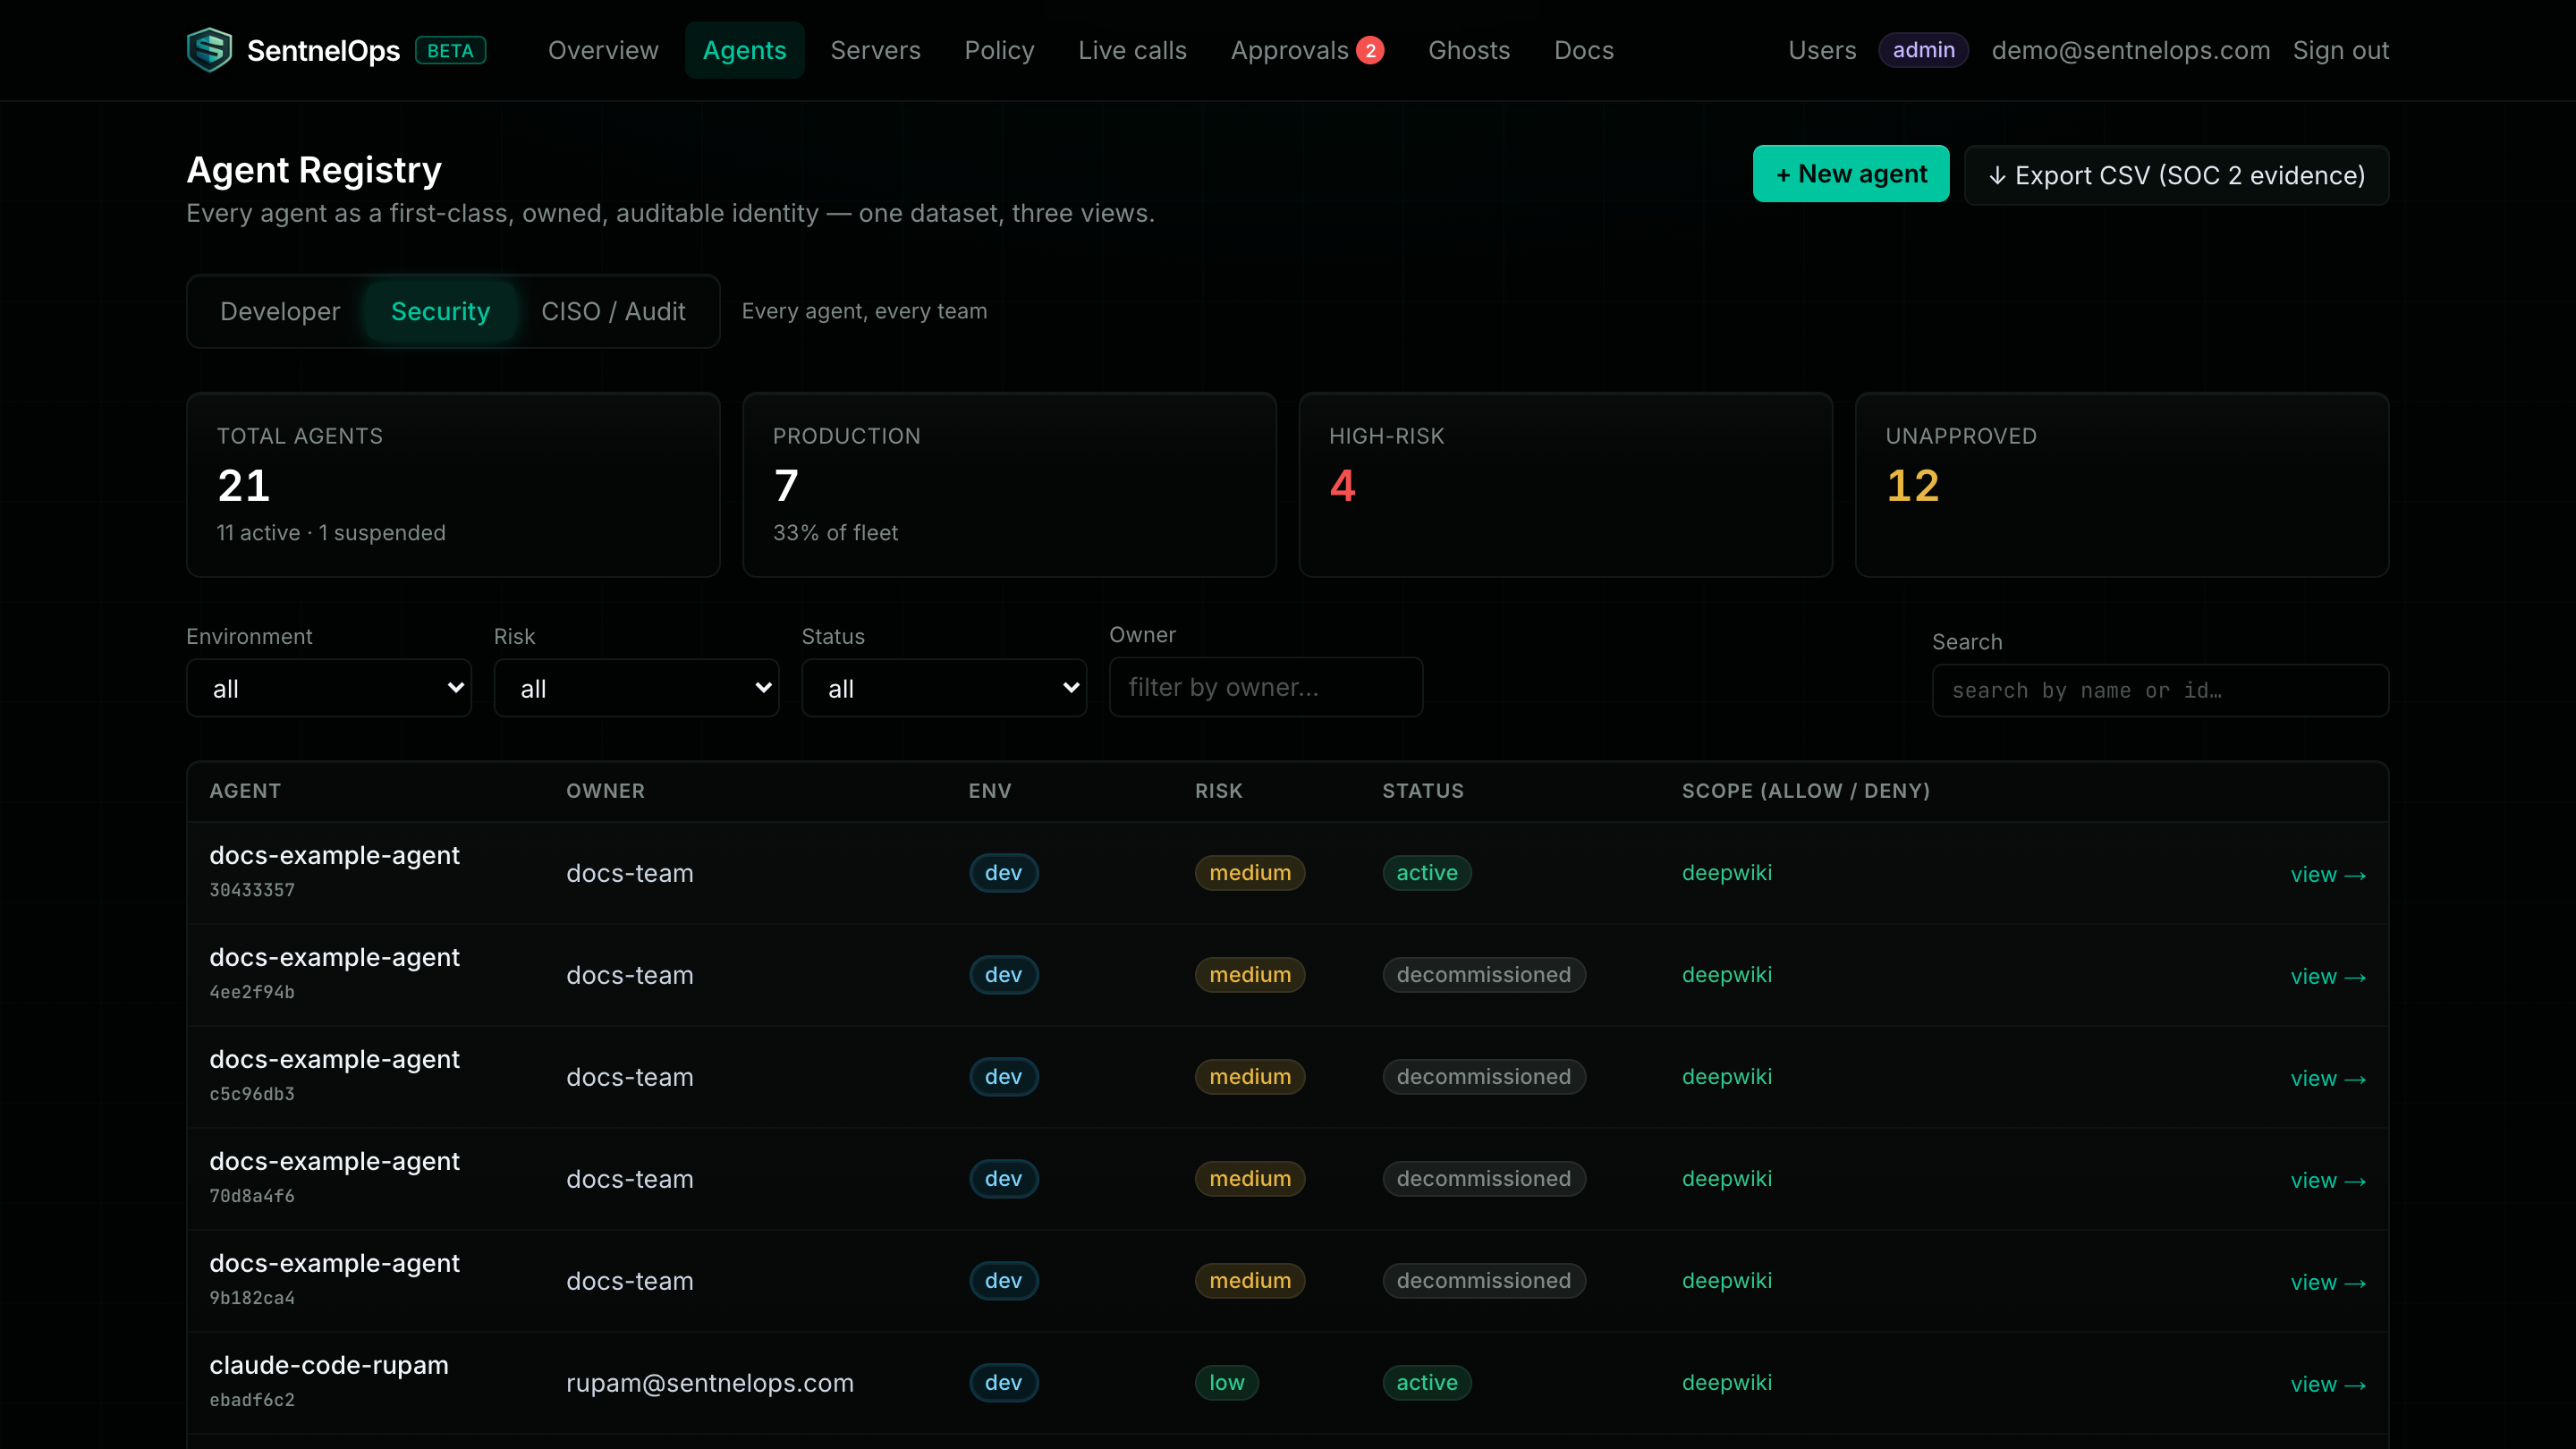
Every AI agent gets a named identity — like an employee badge. Open Agents in the top navigation and click the + New agent button in the top right.
Fill in the form: an agent name, an owner (the person or team responsible), the environment, and a risk level. Under allowed MCP servers, click the chip for the server you added in step 2 — a checkmark appears. Then click Register agent.
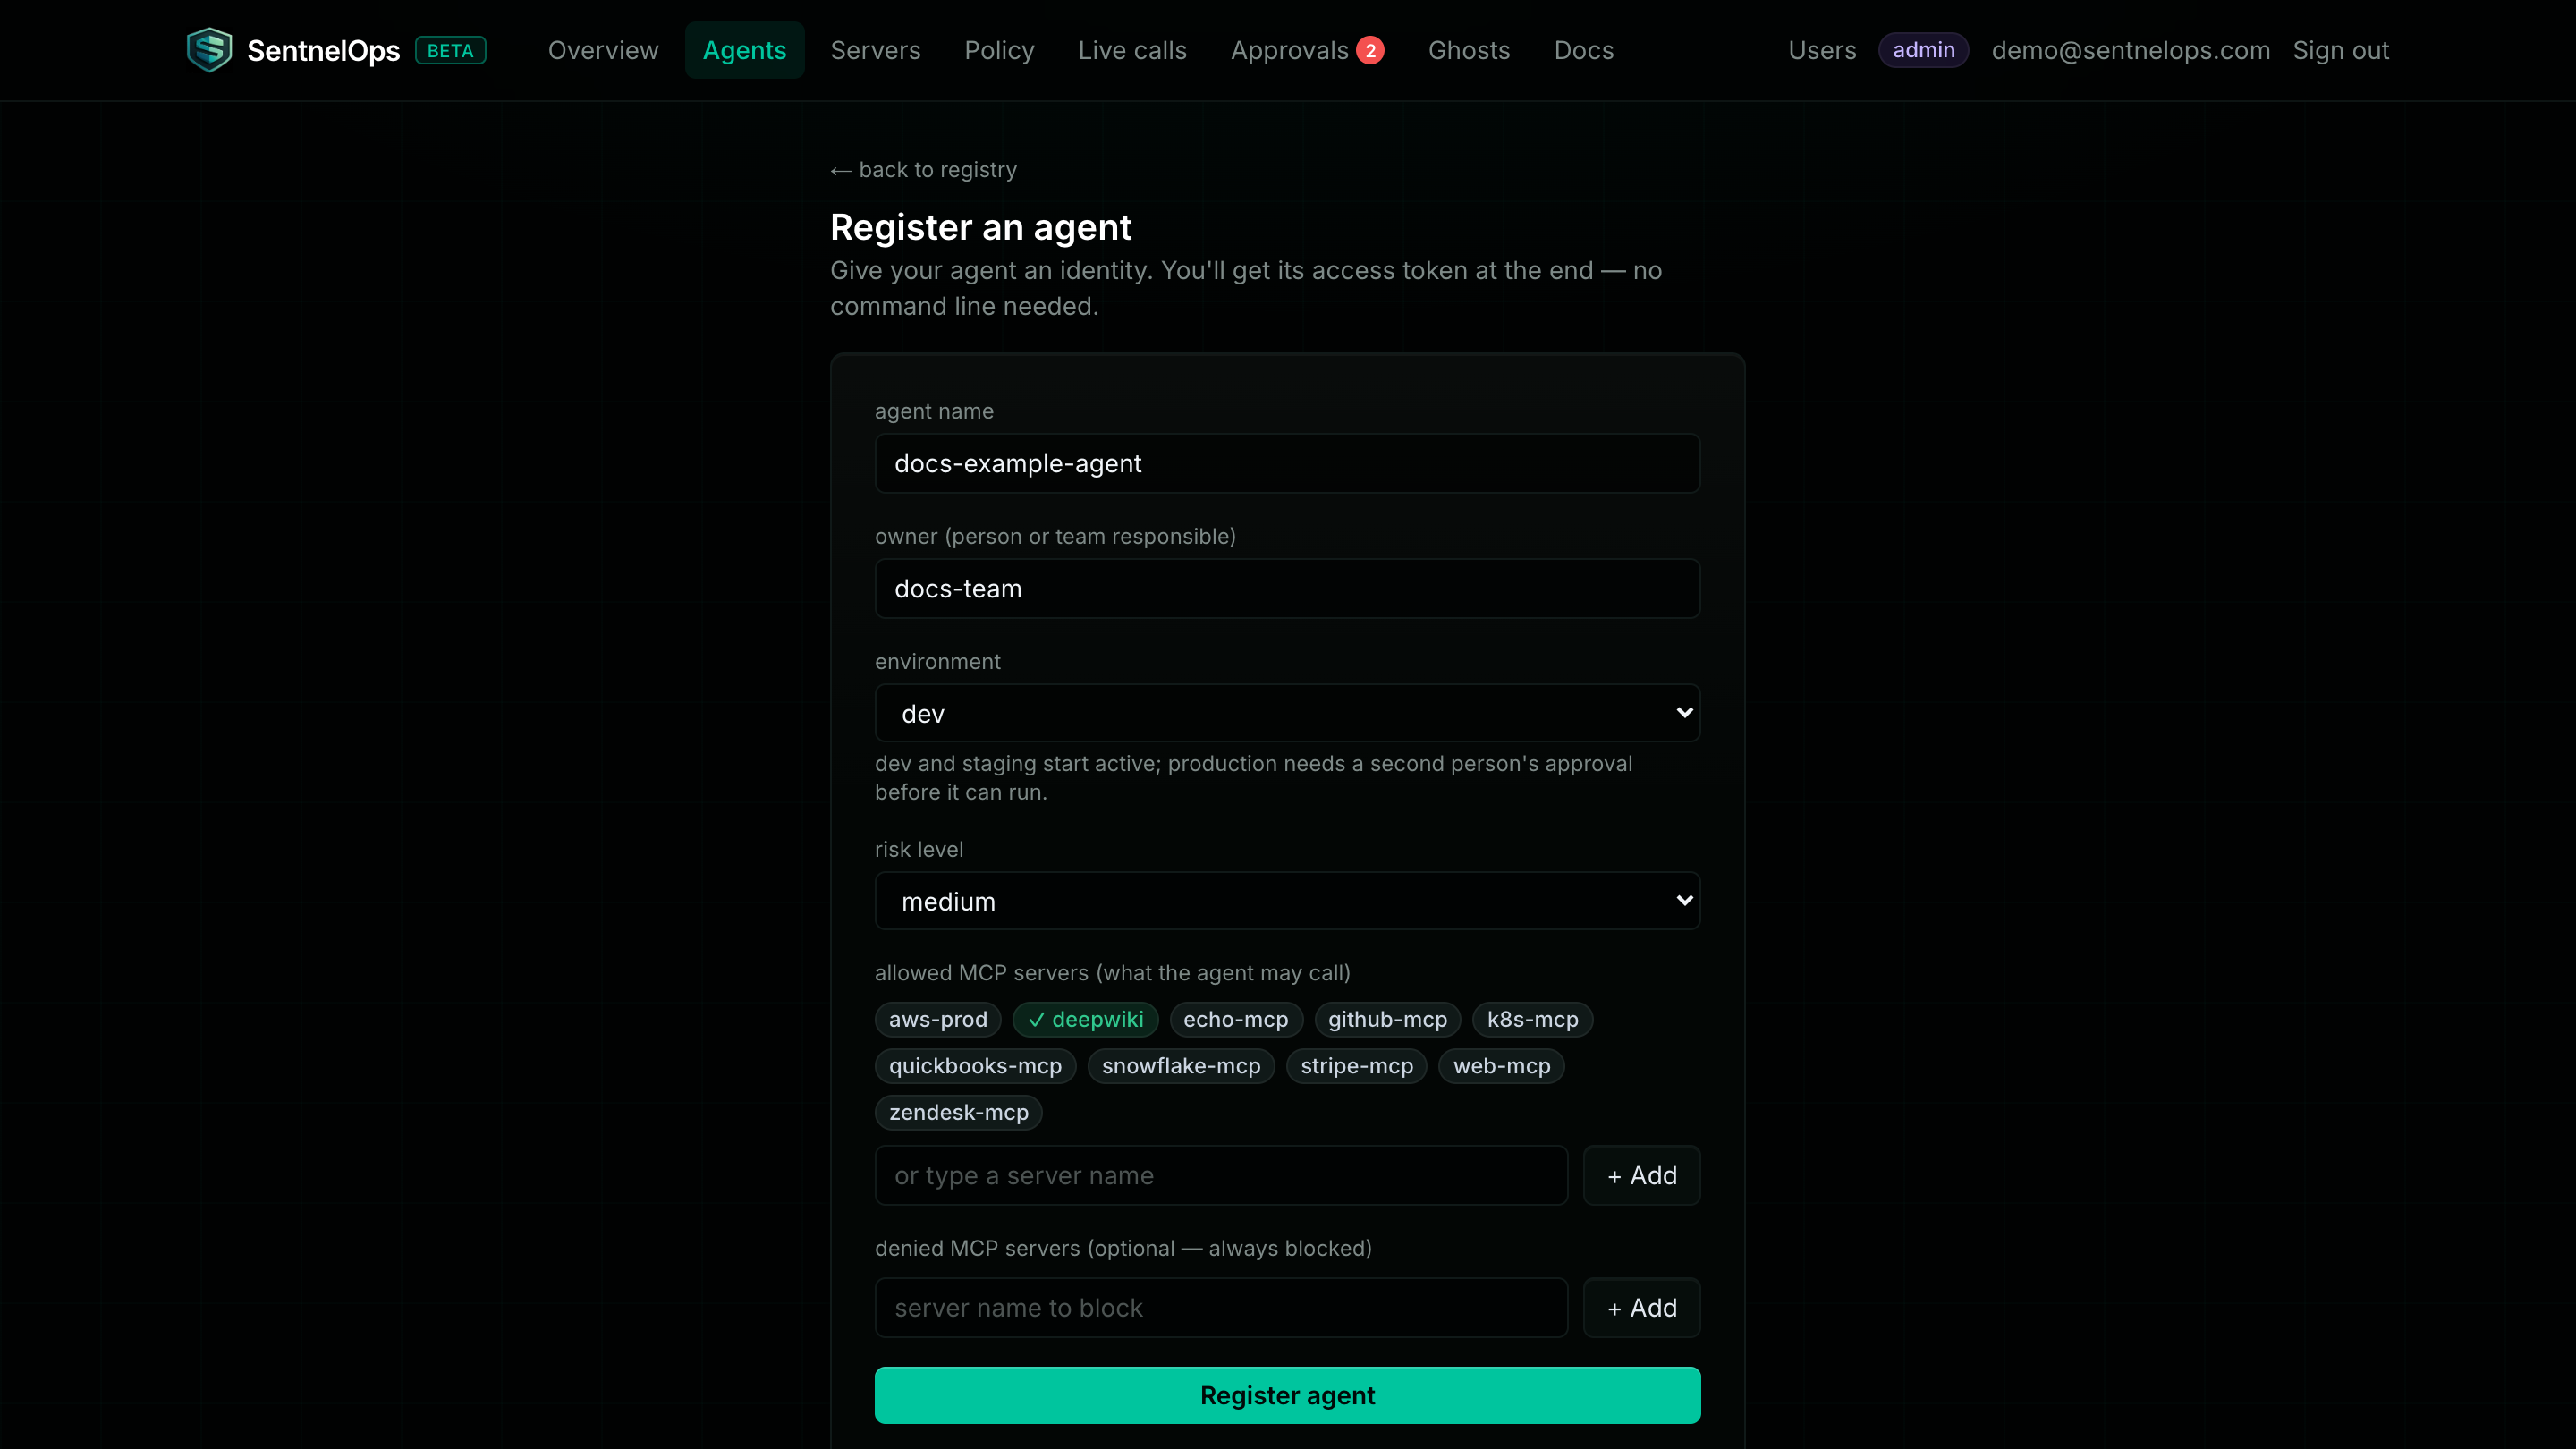
The environment choice matters: as the helper text under the dropdown says, dev and staging agents start active immediately, while production agents need a second person's approval before they can run. For this walkthrough, pick dev.
What just happened? Your AI agent now officially exists: it has a name, an owner, and a written scope — the servers it may call. It shows up in the Registry alongside every other agent in your organisation.
Step 4 — Copy the one-time token
The moment the agent is registered, you're shown its access token — the badge it will show at the door on every call. Click Copy.
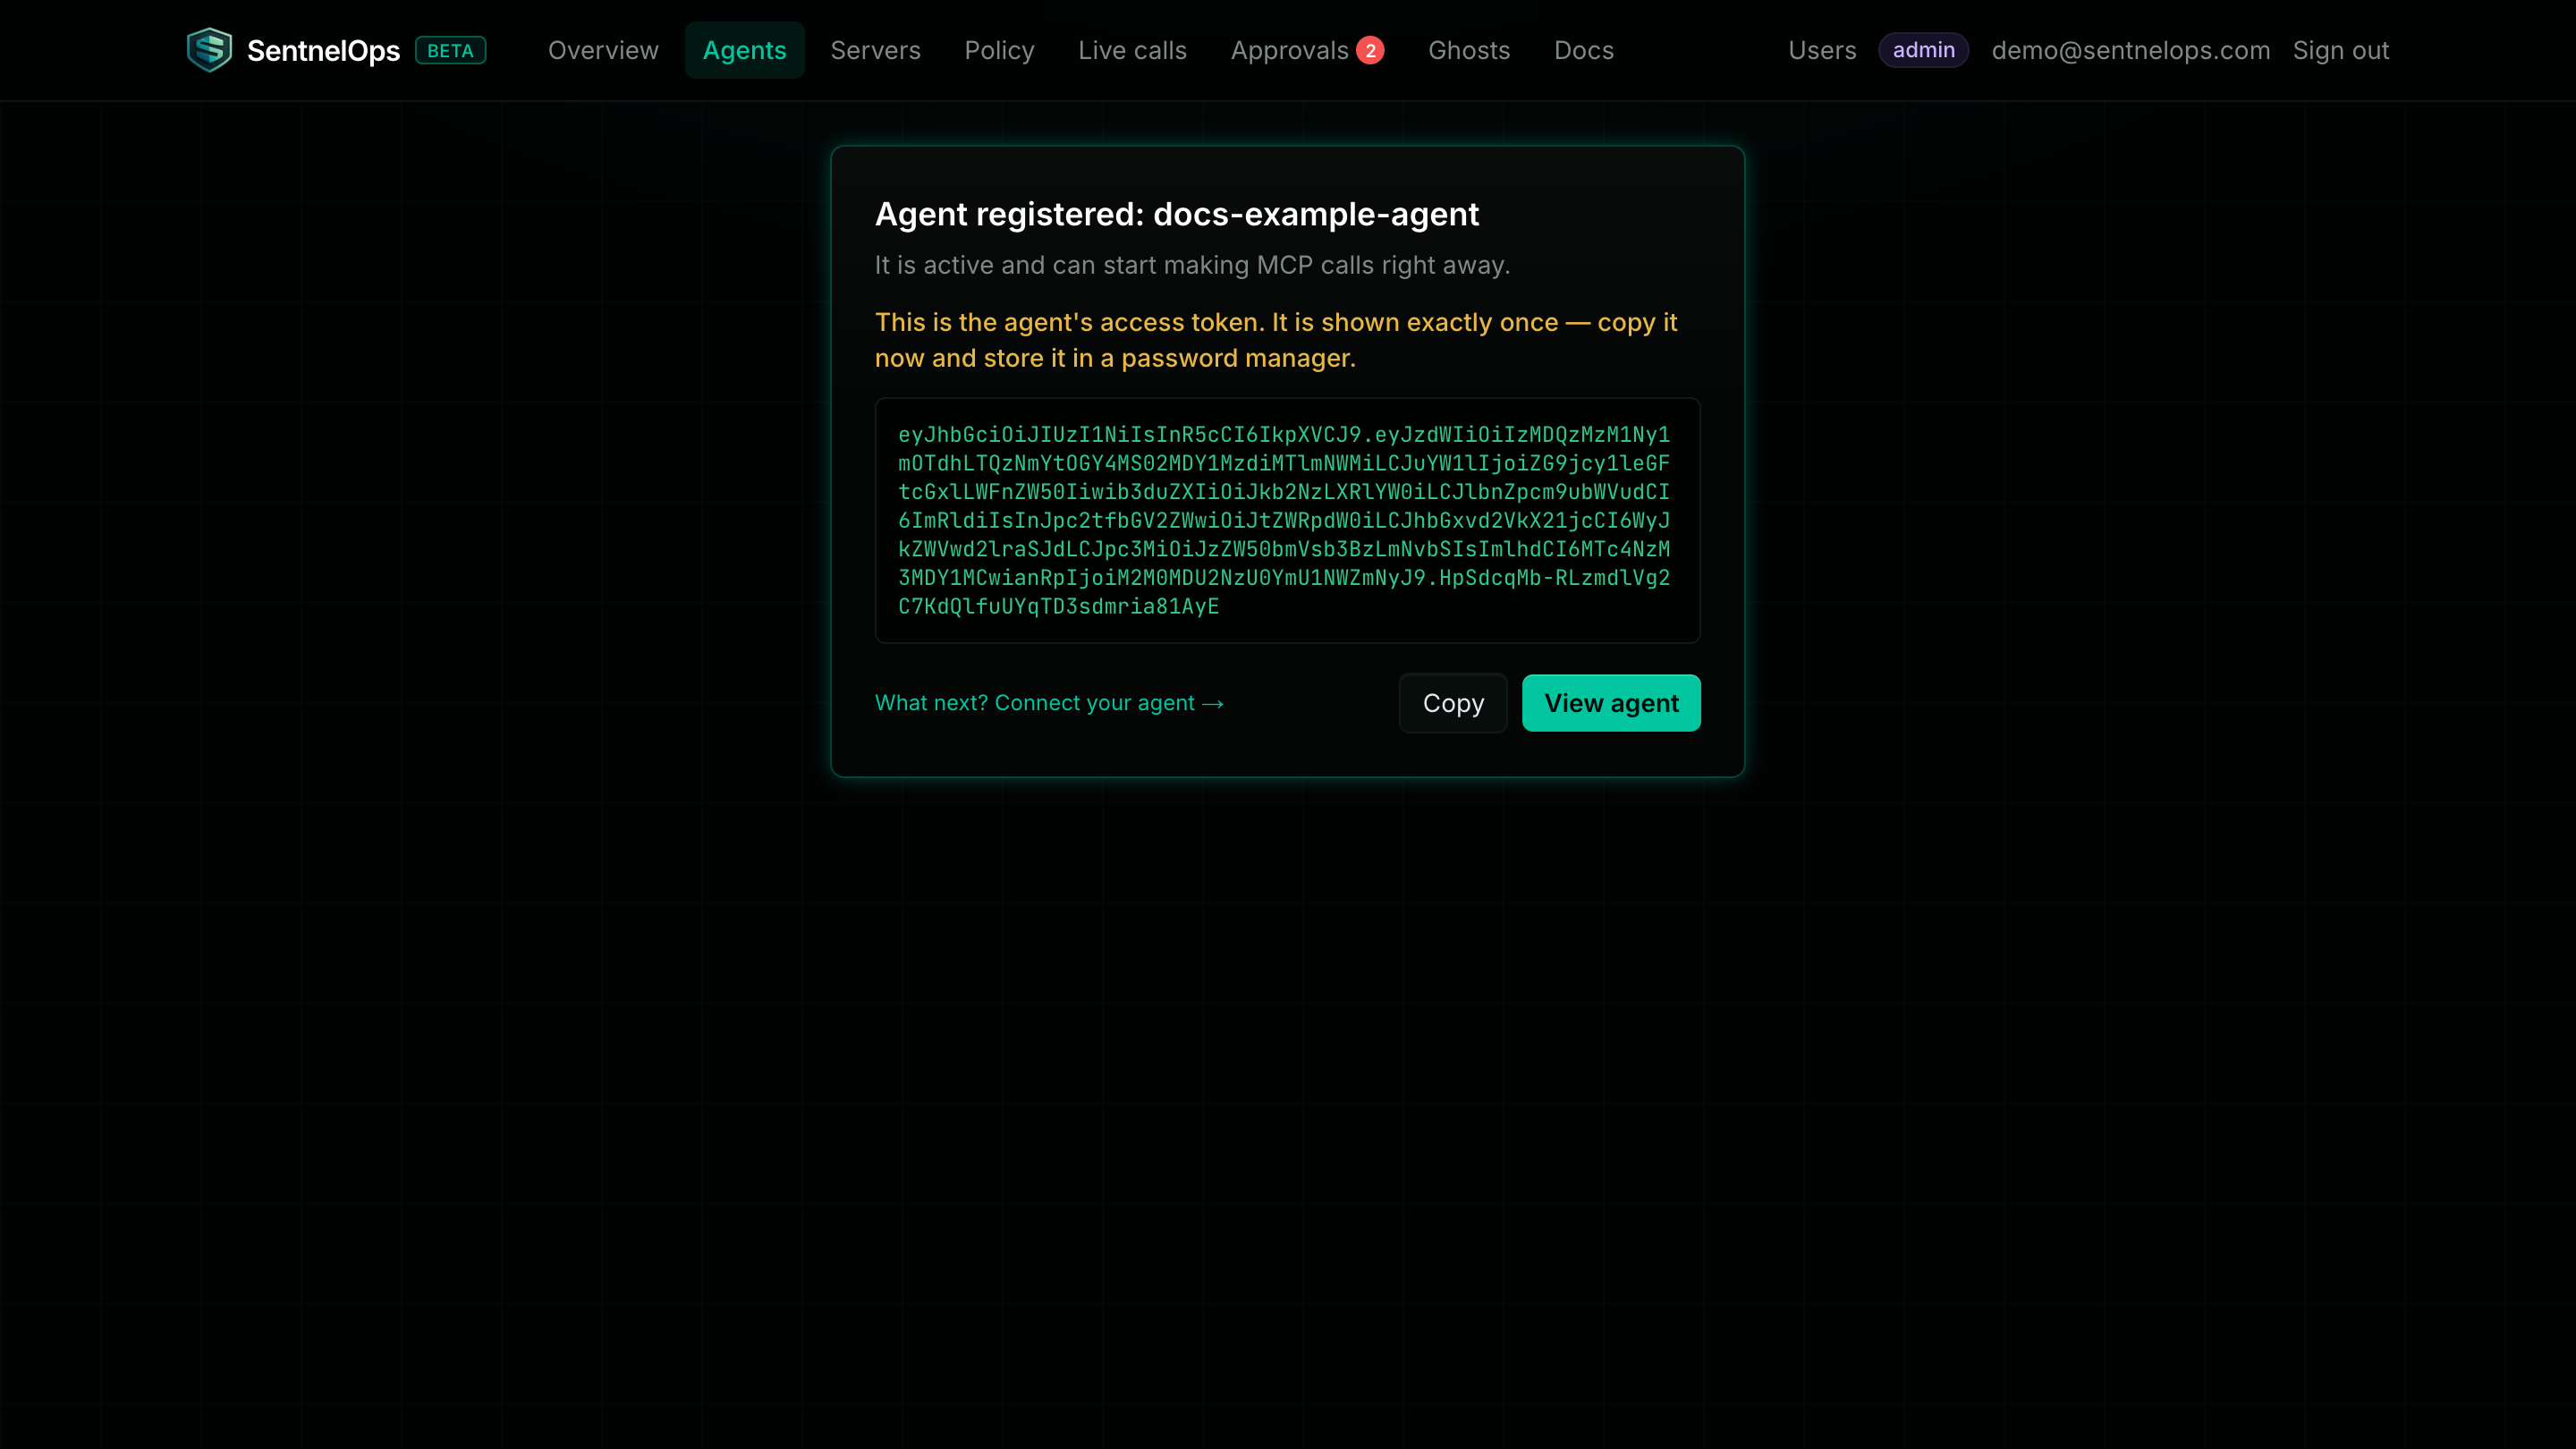
What just happened? The agent got its credential. SentnelOps keeps only a fingerprint of it, never the token itself — which is exactly why it can't be shown to you a second time.
Step 5 — Point your AI tool at SentnelOps
This is the only change to your AI tool, and the only copy-paste in the whole walkthrough: instead of talking to your MCP server directly, it talks to the same server through SentnelOps, showing its badge. Pick your client below. In every snippet, replace YOUR_AGENT_TOKEN with the token you copied in step 4, and replace my-tools in the address with the server name you chose in step 2.
Claude Code — one command in the terminal:
claude mcp add --transport http my-governed-server \
  https://api.sentnelops.com/proxy/my-tools/mcp \
  --header "Authorization: Bearer YOUR_AGENT_TOKEN"
Replace YOUR_AGENT_TOKEN with the agent token from step 4.
Cursor — edit the file ~/.cursor/mcp.json (create it if it doesn't exist):
{
  "mcpServers": {
    "my-governed-server": {
      "url": "https://api.sentnelops.com/proxy/my-tools/mcp",
      "headers": {
        "Authorization": "Bearer YOUR_AGENT_TOKEN"
      }
    }
  }
}
Replace YOUR_AGENT_TOKEN with the agent token from step 4.
Claude Desktop — it needs a small bridge called mcp-remote. Edit claude_desktop_config.json (find it via Claude Desktop → Settings → Developer → Edit Config). If you're unsure, ask a developer to help with this one:
{
  "mcpServers": {
    "my-governed-server": {
      "command": "npx",
      "args": [
        "mcp-remote",
        "https://api.sentnelops.com/proxy/my-tools/mcp",
        "--header",
        "Authorization: Bearer YOUR_AGENT_TOKEN"
      ]
    }
  }
}
Replace YOUR_AGENT_TOKEN with the agent token from step 4.
Anything else — any MCP client that can send an Authorization header works the same way: point it at https://api.sentnelops.com/proxy/my-tools/mcp and add the header Authorization: Bearer <agent token>.
What just happened? Your AI now takes the route past the security desk. It still reaches exactly the same tools and gets exactly the same answers — SentnelOps forwards everything unchanged — but every call is now identified and written down.
Step 6 — Watch it live
Open Live calls in the top navigation and ask your AI to do something that uses a tool. Every action it takes appears in the feed within a second — which agent, which tool, how long it took, and what the policy thought of it.
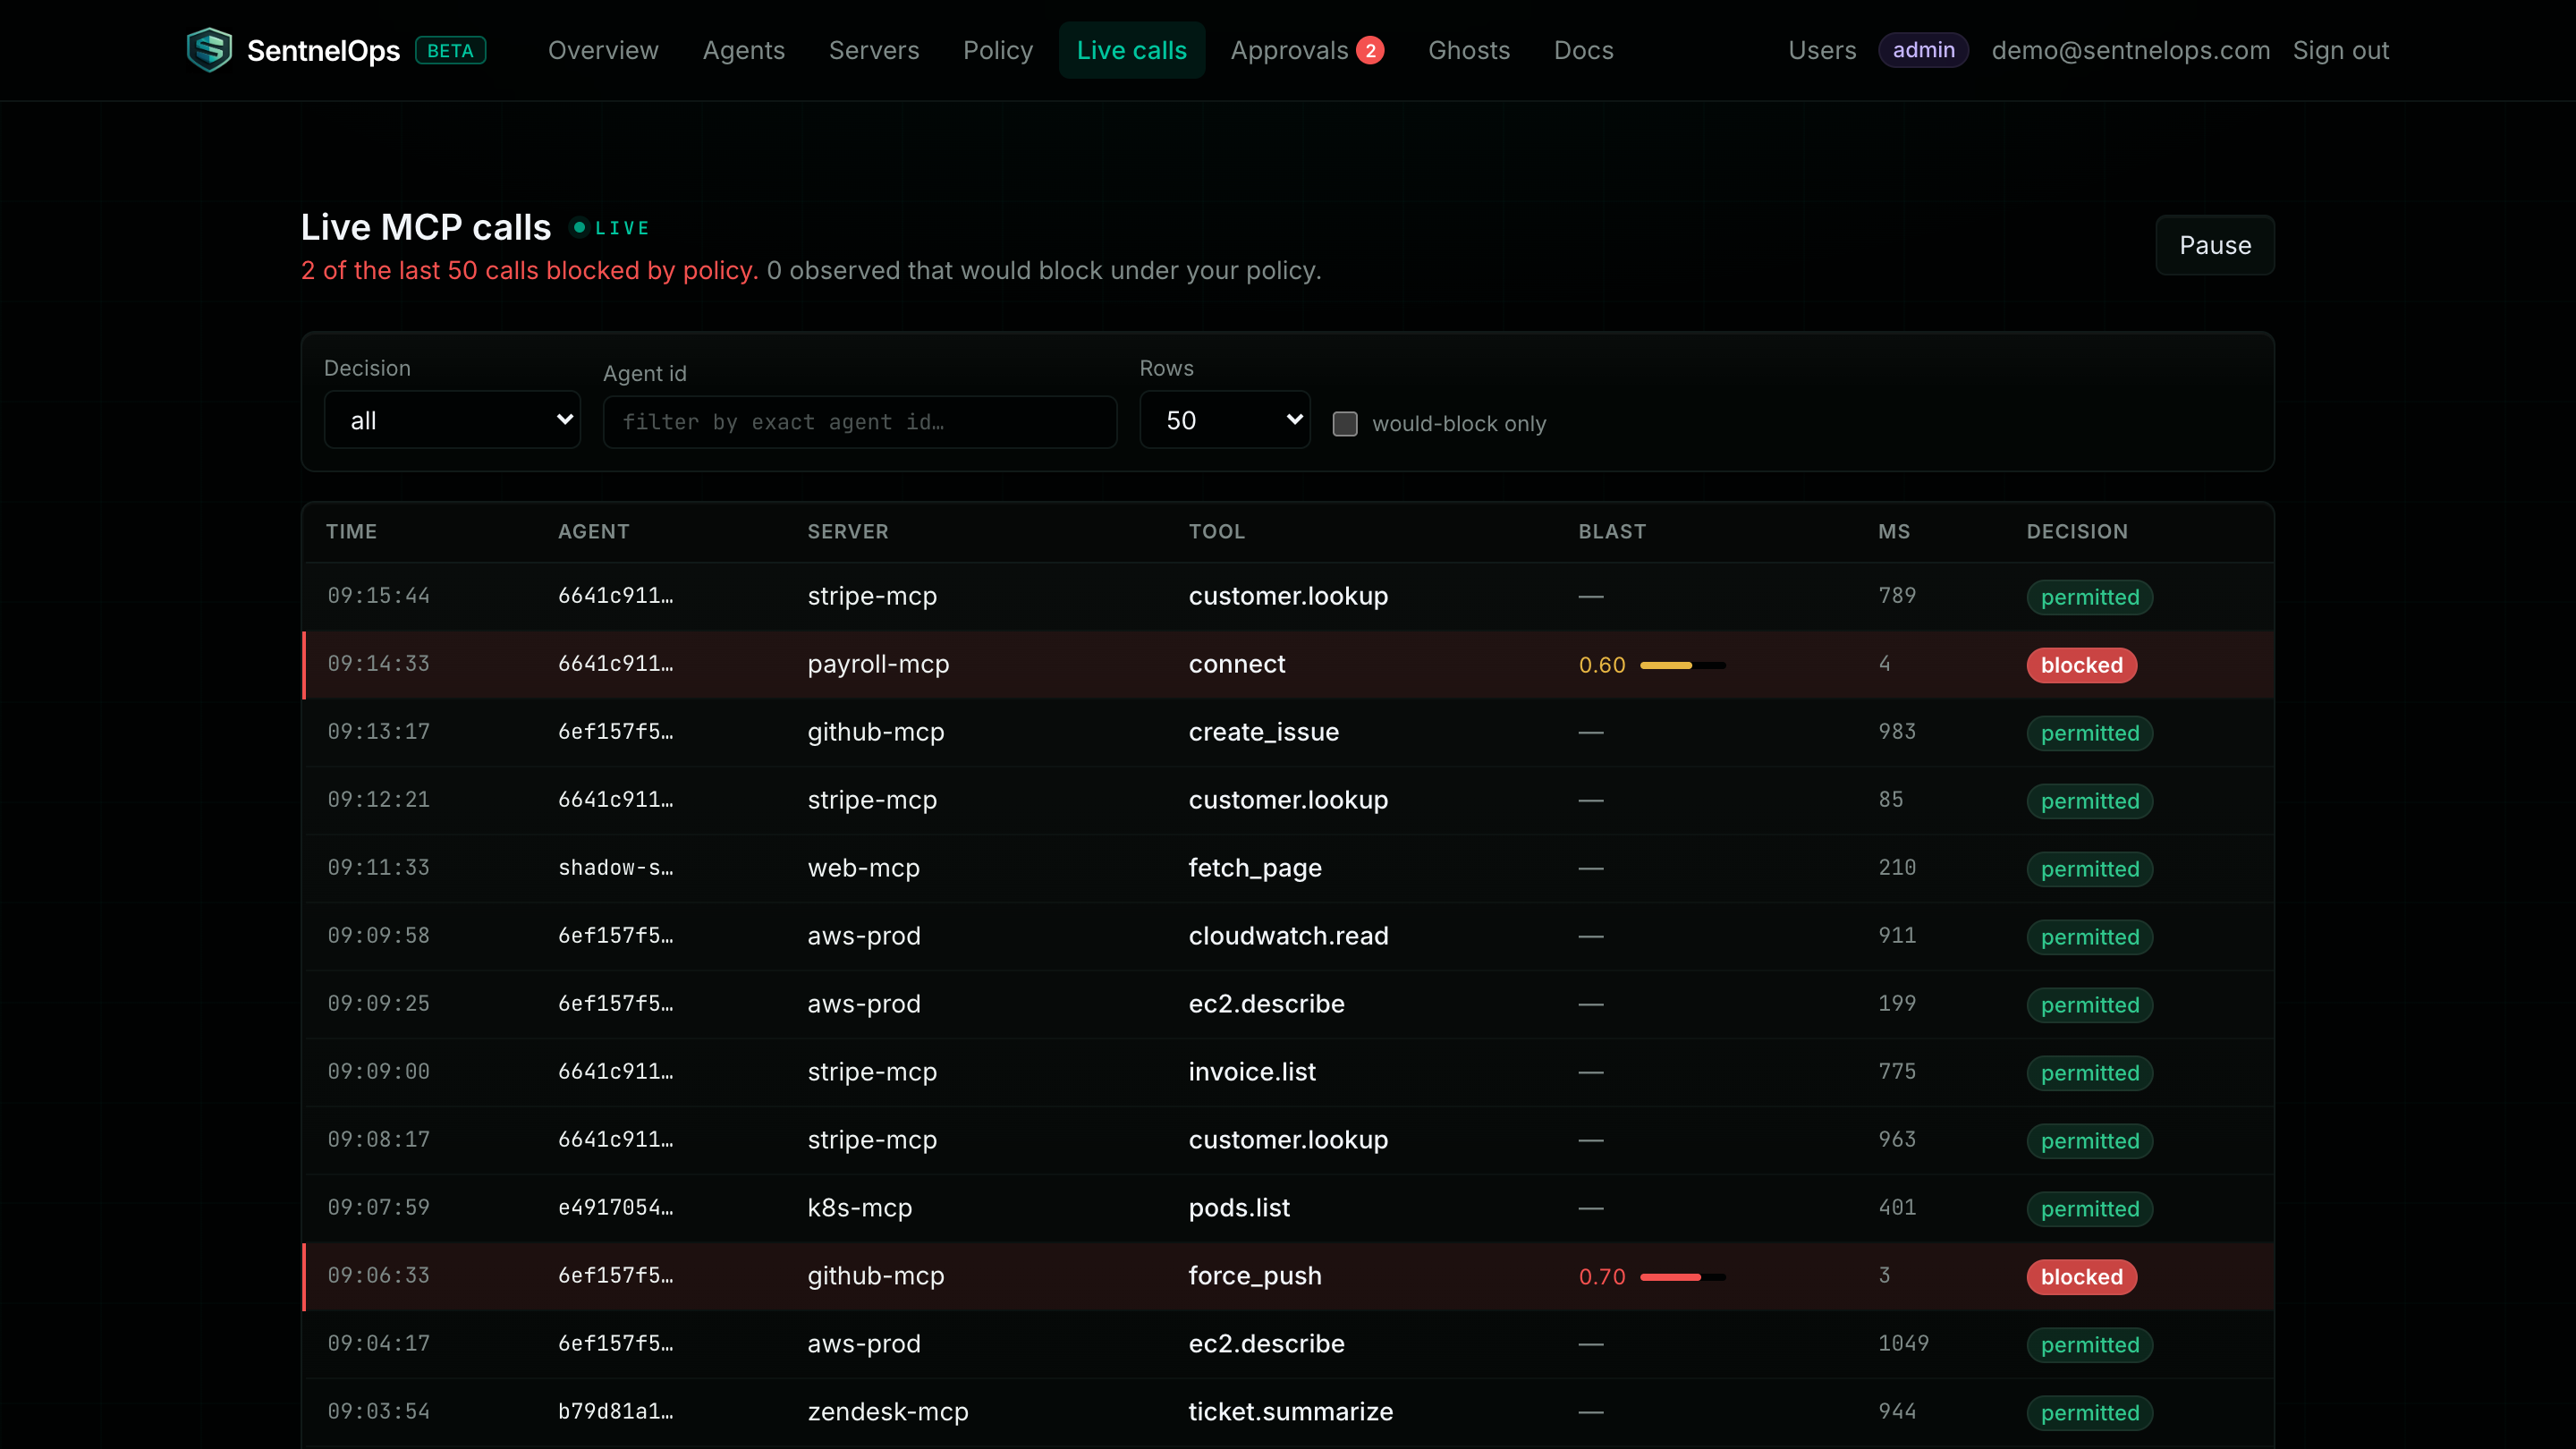
Green permitted rows passed the policy check. Red would block rows are the interesting ones: calls that went through (observe mode never blocks) but that your policy would stop in enforce mode. It's a preview of enforcement with zero risk.
What just happened? This is the whole point: for the first time, there's a page a human can open that shows exactly what your AI is doing, as it does it.
Step 7 — The safety switch
Click your agent's name in the Registry to open its page. Two buttons at the top are your safety switches, and both take effect within seconds:
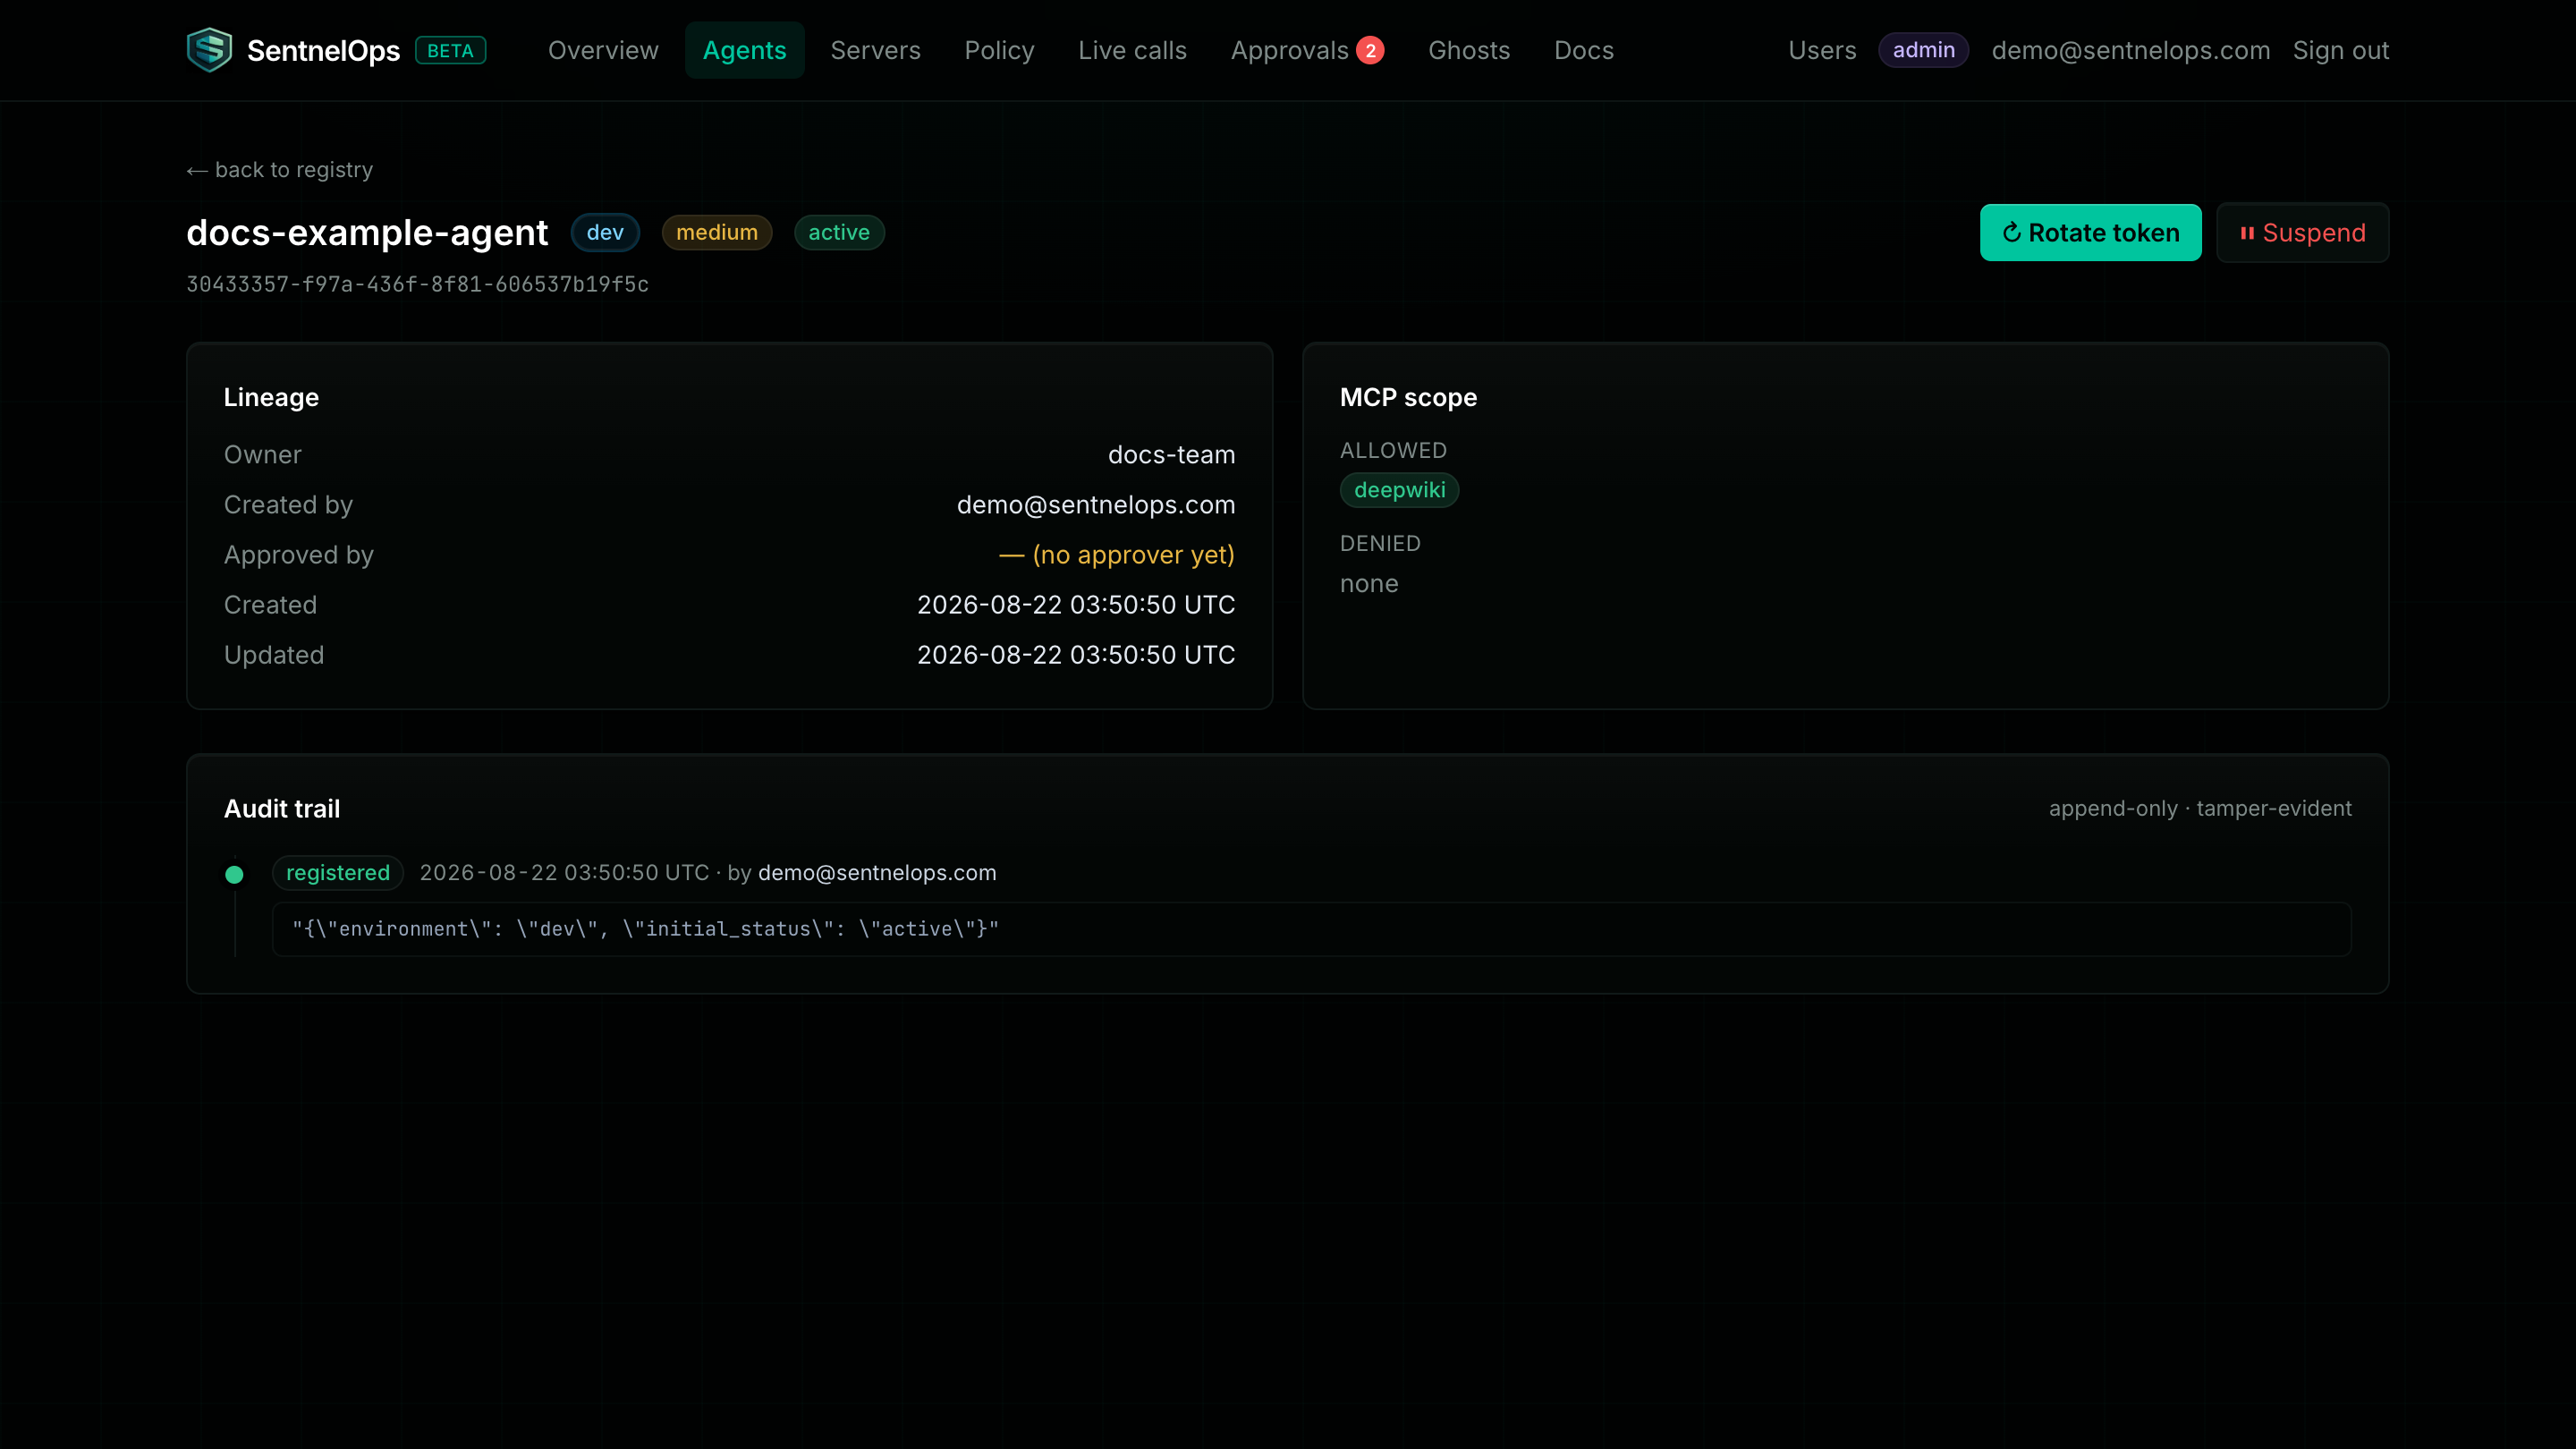
↻ Rotate token issues a fresh badge and revokes the old one on the spot — whatever token the agent is carrying stops working in seconds, and every later call is turned away at the door. The new token is shown once, with a Copy button.
⏸ Suspend pauses the agent formally: it asks for a reason (required — it goes in the audit trail), blocks the agent immediately, and freezes its scope until someone clicks ▶ Reactivate. Suspending needs the security role.
What just happened? You proved the most important property of the whole setup: a human can revoke an AI's access in seconds, from a web page, without asking anyone to find and edit code.
If something goes wrong
The most common hiccups (a 401, an empty call feed, a production agent that won't start) all have one-line fixes — see FAQ & troubleshooting.